目录
一:简介
申请ssl证书,即https有很多,有免费的,也有收费的。如第三方域名管理cloudflare也可以自动添加使用https,而且永久。
但是由于有些服务,需要在服务器使用自签证书,所以需要自己申请。免费的可以使用certbot,也可以是使用zeroSSL。
Cerbot可以参考我以前的文章:Certbot申请免费SSL证书
这里,介绍使用acme.sh生成免费的ssl证书,其完整实现了acme协议,并且由纯Shell脚本语言编写,没有过多的依赖项,安装和使用都非常方便。
对于zerossl官网,需要指出的是,用户可以在控制台直接申请证书,但免费用户最多只能申请3个,而使用ACME申请zeroSSL证书则没有数目限制。
acme.sh官方gitlhub地址: https://github.com/acmesh-official/acme.sh
二:安装acme.sh
安装过程不会污染任何功能和文件,所有的修改都限制在安装目录中:~/.acme.sh/。
以下安装方式,把 [email protected] 修改成自己的邮箱。
1:在线安装方式
安装很简单, 一个命令:
curl https://get.acme.sh | sh -s [email protected]
或者
wget -O - https://get.acme.sh | sh -s [email protected]
这里的-s参数指定的邮箱可以关联到已有的zeroSSL账号。关联成功后,通过acme.sh生成的zeroSSL证书会在zeroSSL网站的控制面板上显示。
2:其他安装方式
用git仓库方式
git clone https://github.com/acmesh-official/acme.sh.git
cd ./acme.sh
./acme.sh --install -m [email protected]
安装完成后,在账号home目录,会生成一个.acme.sh的隐藏目录。
三:颁发证书
注:安装完成后,需要退出当前命令终端,重新登录,才可以使用acme.sh命令
这里已我的网站域名 test.ywbj.cc 做为测试。
配置nginx
server {
    listen 80;
    server_name  test.ywbj.cc;

    root   /www/test.ywbj.cc;
    location / {
        index  index.html index.htm index.php;
    }
}
配置域名目录为/www/test.ywbj.cc,在此目录创建一个index.html文件测试,然后重启nginx。
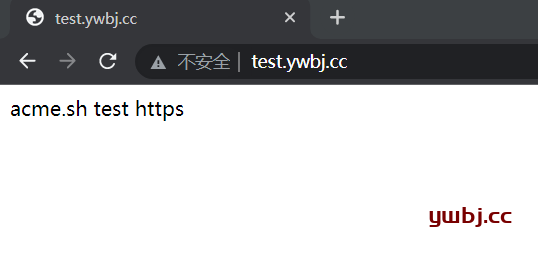
配置完,浏览器打开test.ywbj.cc,可以看到域名提示不安全,没有https.

1:http方式颁发证书给域名
一般情况下,都是这种。如果没有服务器,请使用dns手动。
单个域名
acme.sh --issue -d test.ywbj.cc -w /www/test.ywbj.cc
-d 需要签证的域名。
-w参数说明:
在验证域名的所有权时,具体来说,acme.sh会在网站的根目录下创建.well-known目录,然后再在其中生成验证文件。因此,-w参数指定的路径实际为域名之下,/.well-known位置对应的路径。用与验证此域名是属于你的。
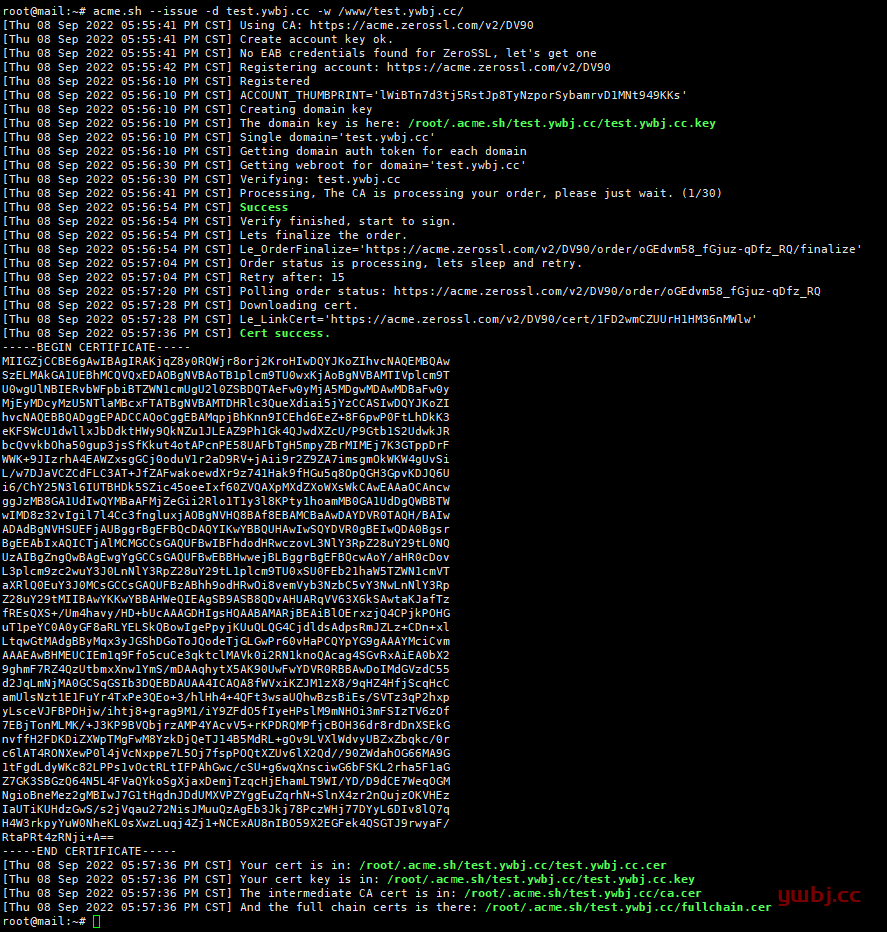
下面图显示,已经成功颁发证书。

如果有多个域名,同一个证书中的多个域。
acme.sh --issue -d example.com -d www.example.com -d cp.example.com -w /home/wwwroot/example.com
证书生成完后将放置在~/.acme.sh/example.com/
证书将每60天自动更新一次。
如下:这里显示的是我test.ywbj.cc的目录下。

2:手动 dns 方式颁发证书
手动 dns 方式, 手动在域名上添加一条 txt 解析记录, 验证域名所有权.
这种方式的好处是, 你不需要任何服务器, 不需要任何公网 ip, 只需要 dns 的解析记录即可完成验证. 坏处是,如果不同时配置 Automatic DNS API,使用这种方式 acme.sh 将无法自动更新证书,每次都需要手动再次重新解析验证域名所有权。
acme.sh  --issue  --dns   -d mydomain.com \
 --yes-I-know-dns-manual-mode-enough-go-ahead-please
然后, acme.sh 会生成相应的解析记录显示出来, 你只需要在你的域名管理面板中添加这条 txt 记录即可.
等待解析完成之后, 重新生成证书:
acme.sh  --renew   -d mydomain.com \
  --yes-I-know-dns-manual-mode-enough-go-ahead-please
dns 方式的真正强大之处在于可以使用域名解析商提供的 api 自动添加 txt 记录完成验证.
acme.sh 目前支持 cloudflare, dnspod, cloudxns, godaddy 以及 ovh 等数十种解析商的自动集成.
四:将证书安装到 Apache/Nginx 等
1,nginx
生成证书后,需要将证书安装/复制到您的 Apache/Nginx 或其他服务器。必须使用此命令将证书安装到目标文件,请勿使用~/.acme.sh/文件夹中的证书文件,它们仅供内部使用,文件夹结构将来可能会更改。
证书目录,自己选择好,我这里安装目录为/etc/nginx/ssl/,所以执行以下命令。
acme.sh --install-cert -d test.ywbj.cc \
--key-file       /etc/nginx/ssl//key.pem  \
--fullchain-file /etc/nginx/ssl/cert.pem \
--reloadcmd     "service nginx force-reload"

2:apache:
如果是apache的话,用以下命令即可
acme.sh --install-cert -d example.com \
--cert-file      /path/to/certfile/in/apache/cert.pem  \
--key-file       /path/to/keyfile/in/apache/key.pem  \
--fullchain-file /path/to/fullchain/certfile/apache/fullchain.pem \
--reloadcmd     "service apache2 force-reload"
五:配置nginx的ssl
更改nginx配置文件,加上监听443端口,和配置ssl_certificate和ssl_certificate_key到指定目录即可。
server {
    #listen 80;
    listen 443;
    server_name  test.ywbj.cc;

    root   /www/test.ywbj.cc;

    ssl_certificate /etc/nginx/ssl/cert.pem;
    ssl_certificate_key /etc/nginx/ssl/key.pem;

    location / {
        index  index.html index.htm index.php;
    }
}
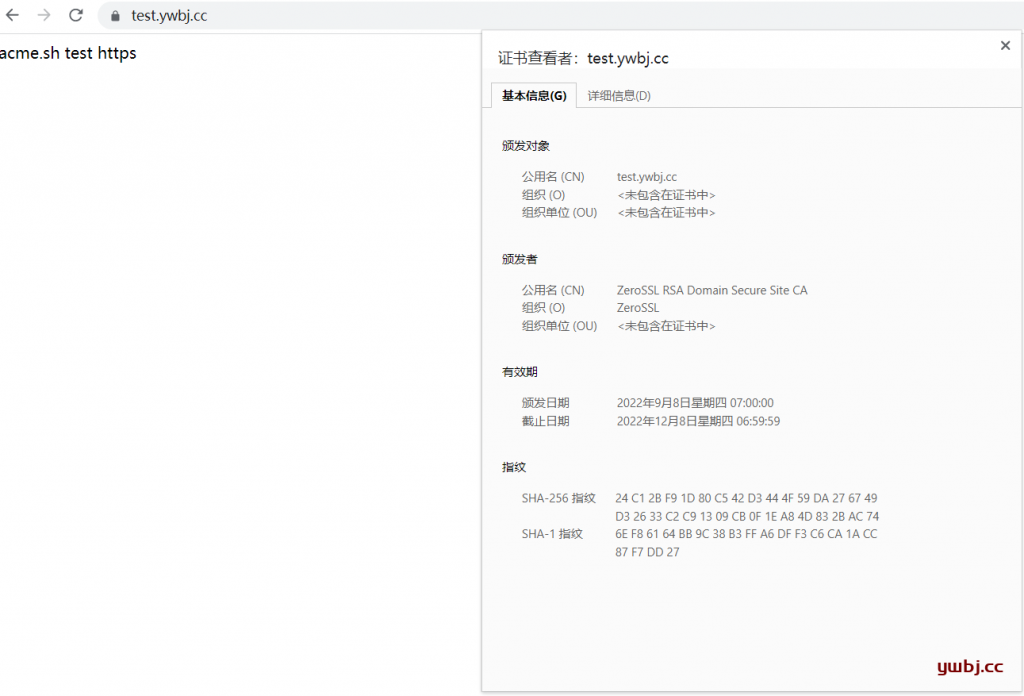
重启nginx,在浏览器再次输入https://test.ywbj.cc/,可以看到已经成功。
查看详细,可以看到是ZeroSSL颁发的证书,有效期为3个月。

目前证书在 60 天以后会自动更新, 你无需任何操作. 今后有可能会缩短这个时间, 不过都是自动的, 你不用关心。你也可以更改这个。
安装证书时,已经自动在crontab定时任务添加了任务。
crontan -l查看定时任务,可以看到acme.sh的定时任务。
crontan -l

2 0 * * * "/root/.acme.sh"/acme.sh --cron --home "/root/.acme.sh" > /dev/null
到这里,nginx的ssl自签证书就已经完成了。
六:acme.sh其他命令(扩展)
1:查看已安装证书信息
acme.sh --info -d example.com
# 会输出如下内容:
DOMAIN_CONF=/root/.acme.sh/example.com/example.com.conf
Le_Domain=example.com
Le_Alt=no
Le_Webroot=dns_ali
Le_PreHook=
Le_PostHook=
Le_RenewHook=
Le_API=https://acme-v02.api.letsencrypt.org/directory
Le_Keylength=
Le_OrderFinalize=https://acme-v02.api.letsencrypt.org/acme/finalize/23xxxx150/781xxxx4310
Le_LinkOrder=https://acme-v02.api.letsencrypt.org/acme/order/233xxx150/781xxxx4310
Le_LinkCert=https://acme-v02.api.letsencrypt.org/acme/cert/04cbd28xxxxxx349ecaea8d07
Le_CertCreateTime=1649358725
Le_CertCreateTimeStr=Thu Apr  7 19:12:05 UTC 2022
Le_NextRenewTimeStr=Mon Jun  6 19:12:05 UTC 2022
Le_NextRenewTime=1654456325
Le_RealCertPath=
Le_RealCACertPath=
Le_RealKeyPath=/etc/acme/example.com/privkey.pem
Le_ReloadCmd=service nginx force-reload
Le_RealFullChainPath=/etc/acme/example.com/chain.pem
2:更新 acme.sh
#升级 acme.sh 到最新版 :

acme.sh --upgrade

#如果你不想手动升级, 可以开启自动升级,之后, acme.sh 就会自动保持更新了.
acme.sh  --upgrade  --auto-upgrade

#你也可以随时关闭自动更新:
acme.sh --upgrade  --auto-upgrade  0
3:颁发ECC证书
单域ECC证书
acme.sh --issue -w /home/wwwroot/example.com -d example.com --keylength ec-256
SAN多域ECC证书
acme.sh --issue -w /home/wwwroot/example.com -d example.com -d www.example.com --keylength ec-256
keylength上面的参数。
有效值为:
ec-256(prime256v1,“ECDSA P-256”)
ec-384(secp384r1,“ECDSA P-384”)
ec-521(secp521r1,“ECDSA P-521”,Let’s Encrypt 尚不支持。)
4:更新证书
自己更新证书
#强制更新证书:
acme.sh --renew -d example.com --force

#或者,对于 ECC 证书:
acme.sh --renew -d example.com --force --ecc
要停止更新证书,您可以执行以下操作从更新列表中删除证书:
acme.sh --remove -d example.com [--ecc]
证书/密钥文件不会从磁盘中删除。
您可以自己删除相应的目录(例如~/.acme.sh/example.com)。
打赏作者

